This is how I leveraged a full range of AI tools to create two short films which earned me recognition in both the 1st and 2nd editions of Runway’s GEN:48 competition.
48:00:00 — Concept and Shot List
It’s 6am, and I’m facing the daunting task of creating a 1-4 minute AI short film, where all videos must be generated in Runway, and contain one element from each of three categories: character, setting, and object.
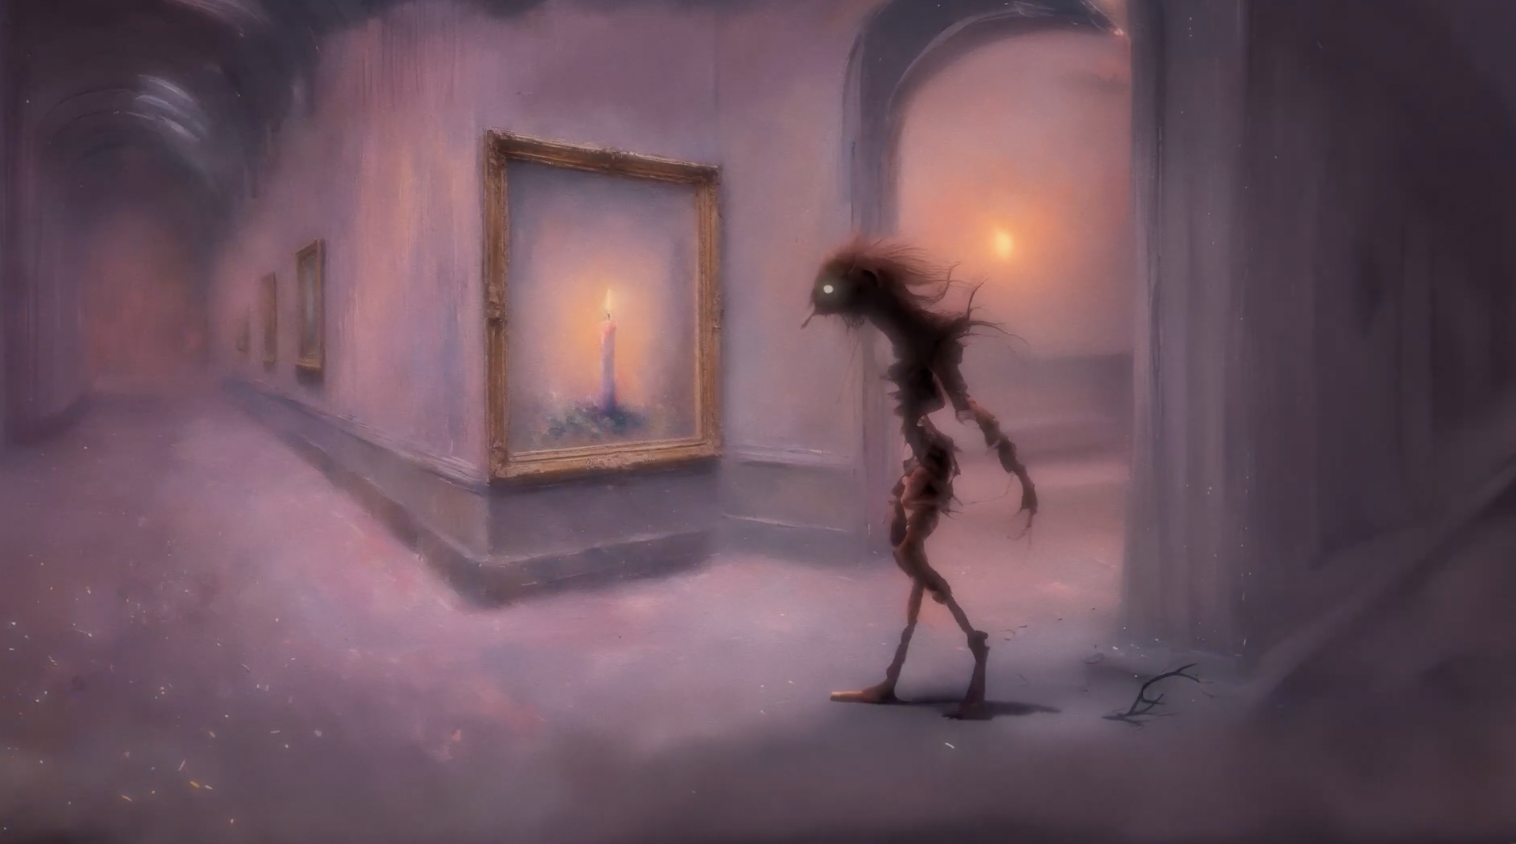
My first stop is to use an LLM (Large Language Model), not for its writing ability, but for its ability to kickstart the brainstorming process. In this competition it is extremely helpful, as there are so many possible combinations of story elements. So I give the LLM all the rules for the contest, and the list of the three elements, and it immediately starts to give me numerous top level story ideas that I can use as a starting point. I ultimately choose a misunderstood character, in an art museum, with a lit candle.
To make the LLM’s film summary uniquely mine, I modify it to serve as a loose guide for my desired storytelling approach. Having a loose story idea is key here, because we’re not to the point of AI video yet that I can completely trust the desired shot I want will be executed in the way that I want it. It is important to be open to how you want to visually tell the story and adjust it as you go.
Next I create an outline for the story structure, and then finally a shot list of how I want to tell the visual story. If you are unfamiliar with the shot list, it’s just that – a list of all the shots I think I’m going to need to tell this story. It’s a list to work off of, as not everything that is needed visually is written in the script. This is the part of the director’s job that I love the most.
46:17:41 — Choosing a Style
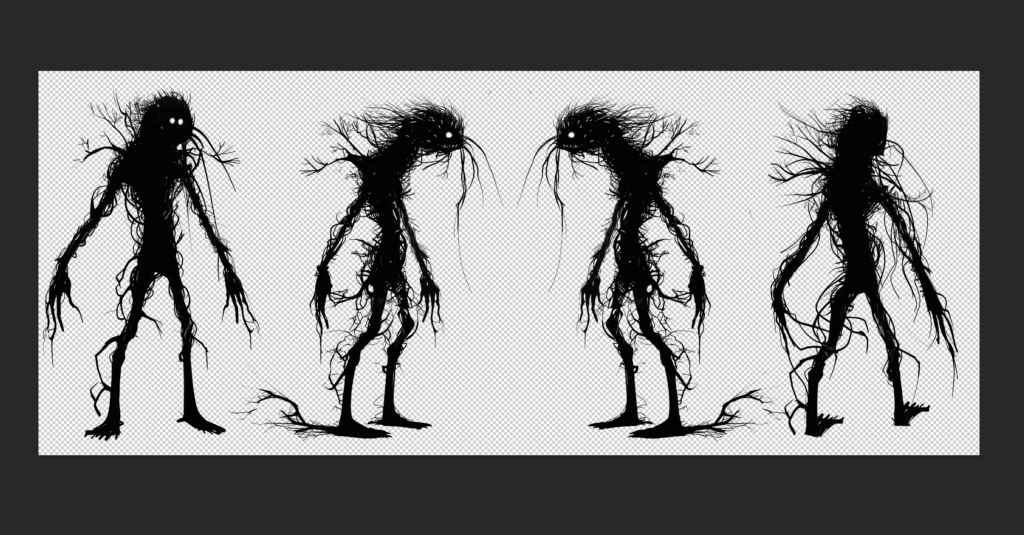
Now that I have my story, I need to choose the style of the video, style of my character, and then create a character sheet. I want to go with a sketch on white paper feel, but I just can’t seem to nail the look I’m going for, so I pivot. My daughter is obsessed with Monet, so after a few more text to image tests, I choose to use the impressionist painting style for my look and feel. Next I use text to image to create the misunderstood creature, using the prompt:
“A character sheet of a bizarre and plump creature. The style of the creature should be in the style of a scribble or child’s drawing. I need to see the full body front, full body side profile, and the back view of the character in the character sheet. Split into three, aspect ratio 16:9.”
Immediately, text to image gives me some pretty great results, and with a little tweaking in Photoshop, I am able to create a full body character sheet with layers that I can use later.
44:30:24 — Workflow Planning
So now with the character and background style chosen, I need to think of a plan of how I’m going to do this workflow and actually create this film within the time remaining.
The plan is to think of this workflow as something similar to how old school animation works, where you have the background layer separate from the characters. This means creating numerous backgrounds as one layer, and the character on a separate cell, ultimately combining them later during animation. I tried a few test shots, and this process seems that it will work perfectly. Hell yeah.
43:35:44 — Generating the Shot List
Now I take my shot list and start making all the backgrounds and b-roll shots I need. After two hours of text to image generation, I have great results, but don’t have everything I need for my sets. So I decide to try and train a model in Runway on the look and feel I’m going for. This takes a while, but it works great to fill in the gaps for my shot list that I am not able to accomplish with text to image alone.
41:45:20 — Prompting Continues
Two and a half hours later, I’m still prompting, but I’m close to finishing the shot list and moving on to animation.
38:30:04 — Starting the Animatic
It’s been ten hours and I still haven’t finished all of the image generation, but I begin creating the animatic in a video editor to start to build the story. If you’re unfamiliar, think of an animatic as a rough cut of the animation, timed to the voiceover and music. For this animatic, I’m going to basically make the film twice. Once to figure out my final shots, and then again with the final animations.
First, I layer in the b-roll shots and the background images in a rough story order. I add a PNG of my character to the scene, and adjust both the size and placement of the character, and also the shot, similar to the crop duster method I talked about in a previous video. But in this project, I will finalize my animatic first, and then go into Photoshop and recreate these starting animation frames in higher resolution, and with more control.
35:22:05 — Animation
With only 35 hours remaining, I am just now ready to start animating some of the clips in Runway. I don’t generally multitask, but when under a tight deadline, and when you are working alone, it’s an important part of the workflow in AI filmmaking. Now I jump back and forth between Image to Video in Runway, and recreating the shots with the creature in Photoshop that I roughly sketched out in the animatic.
32:27:45 — Upscaling
Animation is going well for the b-roll images in Runway. As I wrap up batches of shots, I start upscaling Runway’s output videos to 4K MOV files. My eyes are starting to blur, but I need to do at least one more hour of this workflow to keep up the pace. During last year’s competition, I was already finished at this time, so I’m getting a little nervous about making the deadline.
31:10:29 — Shut Eye
It’s now 11:50 PM, and I have been at my computer for 17 hours straight. I feel good about the amount of shots I have finalized and added to the cut. And we’ll have to finish the rest of the character animation tomorrow. I just can’t keep my eyes open enough to generate one more shot.
25:00:31 — Wake Up and Panic
5am is my normal wake up time, and my biological clock doesn’t give a damn that I slept terribly for only four hours, dreaming of all the shots I still had to generate. So I’m up, getting coffee, and jumping back into the project to try and pick up where I left off.
After a brief inventory of the project, I realize I only have… 36 more shots to generate!? I better get to it.
20:40:18 — Fine Tuning and Editing
I’ve been generating for more than four hours already and still have 27 shots left to go.
I’m going back and forth between generating character movement with the Multi Motion Brush tool and fine tuning the edit at the same time. As I finish more and more video clips, I start to add some light sound effects and finishing’s to the edit so I can be as far along as possible when the video generation is complete.
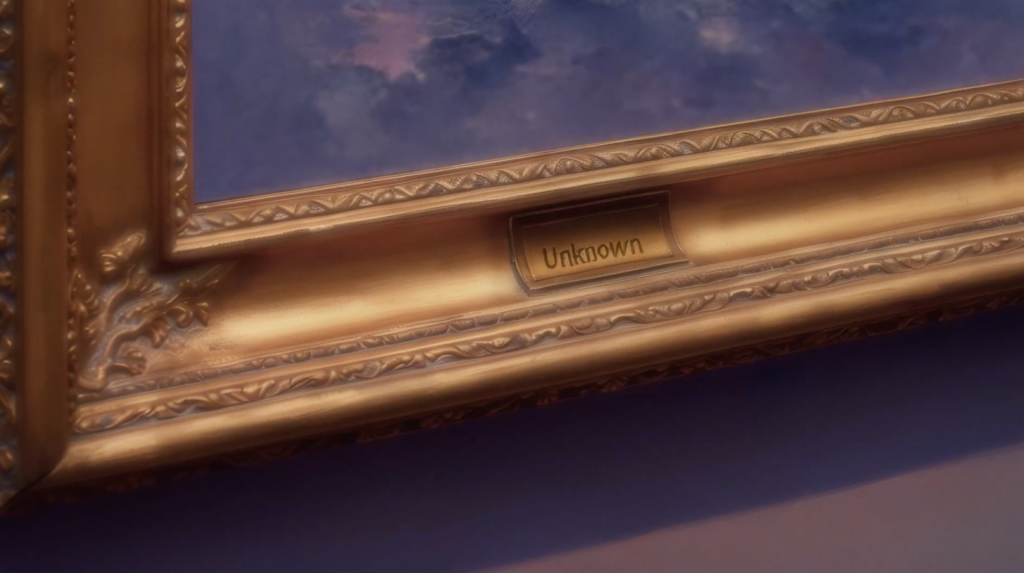
16:00:57 — A Three Hour Challenge
With only 16 hours remaining, all but three shots are finished. And these are critical to the story. Two of them are close up shots of the plaque that says “UNKNOWN.” I’ve tried every prompting technique I know of, and I just can’t get the results I’m looking for. I keep going, and eventually, with some help from Photoshop, finalize two of the three remaining shots.
It only took me uh, hold on, let me look at the clock. Three hours? Damn, what am I doing with my life?
13:00:57 — The Last Shot
Now there’s only one final shot left to create. A time lapse shot of art patrons checking out the museum’s new painting. Creating a time lapse in Runway is not easy, but I know it’ll be a great ending to my film, so I press on. But with a mushed mind and blurry eyes, I’m running on pure artistic adrenaline, unsure of how I’m going to do this technique.
After a few deep breaths, the workflow becomes clear to me: do it in steps. Keeping the final wide shot in mind, I reverse engineer the shot in my head, thinking of what it would take to edit a time lapse like this if it was real. If real, I would let the camera run for a very long time watching the venue fill up as more and more people arrived. I would then cut this into three or four shots with only a simple fade in between them – easy.
So then with renewed confidence, I say to myself, “There’s a way to do this in reality, then why can’t I do it with AI?” I immediately bring the background plate into Photoshop and start to use generative fill to build my scene, adding in more Monet styled people in different layers.
After building my master scene and cleaning it up a bit, I turn off all the new generative fill layers one at a time and export each instance as its own PNG.
Next, I take these individual shots into Runway and animate the people in each shot using Multi Motion Brush. Then, like I would in a real time lapse, I simply put these clips together in a sequence and add a camera movement in post. And because I have already made all the finishing layers, all I have to do is drop this clip into my edit and I’m finished.
Oh wait, f*** me. I still have to edit the entire sound design as well.
09:59:34 — Export
With less than ten hours remaining, I can barely see the screen in front of me. But what I can see looks really, really good. I could go back and try to make it perfect, but I know that if I start down this path, I will never finish in time. As they say, perfect is the enemy of good.
So with complete exhaustion, I finally click the export button and upload my entry to the GEN:48 submission page. And pass out
Less than three days later, I was thrilled to hear that out of 1600 signups, I was one of 40 that made the finalists list, and was even more thrilled to find out that a few weeks later, I was one of only eight winners, winning the Runway GEN:48 2nd Edition Best Art Direction award. The 2nd Edition had so much great competition, and I was really impressed by the winning films, but also those from the finalists list. It’s really humbling to be part of such a vibrant and growing community of AI filmmakers.
I hope this video helps you in your journey. And if you haven’t seen it yet, you can watch Unknown here: